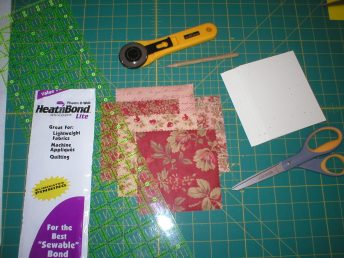
- pencil
- several prints from a charm pack (or scraps of fabric)
- fusible webbing (I use Heat ‘n Bond Lite. There are other brands (Wonder Under, Stitch Witchery), but if the glue is too heavy, it can gum up your needle. From several emails, there seems to be some confusion about fusible webbing. It is NOT interfacing. Fusible webbing turns your fabric into an iron-on.)
- cardstock rectangles cut into 4 1/4-inch x 5 1/4-inch rectangles (this is the paper that you will sew the fabric to. Then, this piece will be taped to the front of a card)
- 4 1/2-inch x 5 1/2-inch cards (this is what you get when you cut an 8×11 sheet in half and fold it)
- scissors for cutting paper
- double-sided tape
- rotary cutter (optional)
- cutting mat (optional)
Step 1: Cut out squares of fusible webbing.
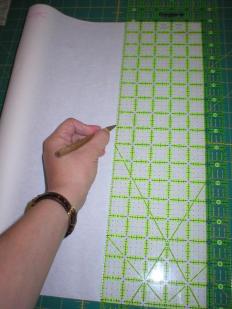
Since fabric in charm packs come in 5-inch x 5-inch pieces, I measure and draw a grid on my fusible webbing just a bit smaller at 4 7/8 inches x 4 7/8 inches.

Cut out the fusible webbing squares with your paper-cutting scissors. The paper will dull your good sewing scissors.
Step 2: Iron fusible webbing to the back of fabric
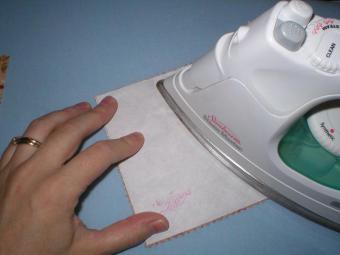
Place the fabric right side DOWN on the ironing board. Place the sticky side of the fusible webbing onto the back of the fabric with the paper side up. Iron on according to fusible webbing instructions (just a few seconds on medium heat in my case).
Step 3: Peel away the paper backing.
Step 4: Cut the fabric into quarters

Cut the fabric into 2 1/2 inch squares
Step 5: Fuse the fabric to the paper rectangles

Make sure when the piece goes off the edge that you don’t fuse the fabric to the ironing board cover.

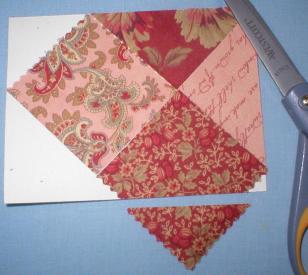
Pretty soon, you’ll have something that looks like this:
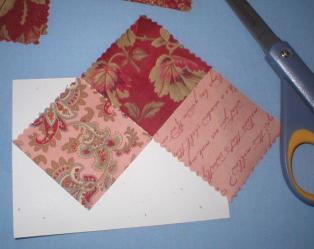
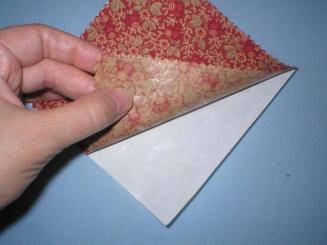
Turn the paper over and trim the extra fabric off.

Don’t throw those little pieces away because most of them can be used. For example, this little triangle…
…can go at the top left corner:
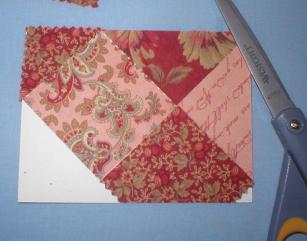
Continue to fuse and trim and iron down the edges until the front of the card is covered. Notice how my peicing isn’t perfect? The decorative stitches will cover up some of these imperfections.
Step 6: Sew decorative stitches onto the “seams”.

I chose a gold thread to go with the fall colors. I like high-contrast threads as well that make the decorative stitches pop.
My favorite stitch these days is the sewn-out zig-zag.
Sewing through paper on a sewing machine will dull the needle. I keep a needle specifically for this purpose and put a sharp one back in when I go back to sewing fabric.
Step 7: Edgestitch the card with a straight stitch.

Step 8 (optional): Embelish with buttons, ribbon, etc.
Step 9: Stick “quilt” to the front of card using double-sided tape.
Here are some samples of other colors and styles:
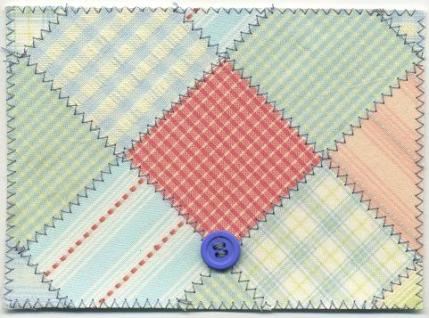
Faded Memories with blue button.
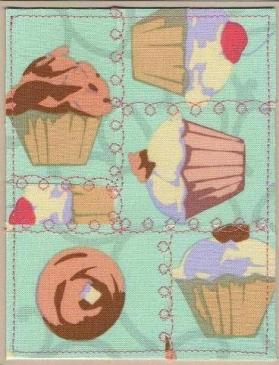
Martha Negley’s Cupcake Fabric with little loop stitches.

April Cornell’s Poetry fabric.
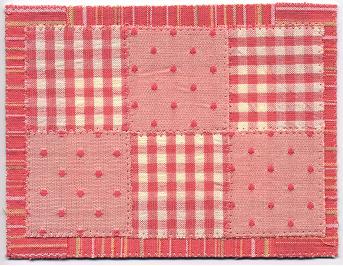
Faded Memories fabric.
from : http://craftapple.wordpress.com/2006/08/23/quilted-cards-tutorial/
Tidak ada komentar:
Posting Komentar